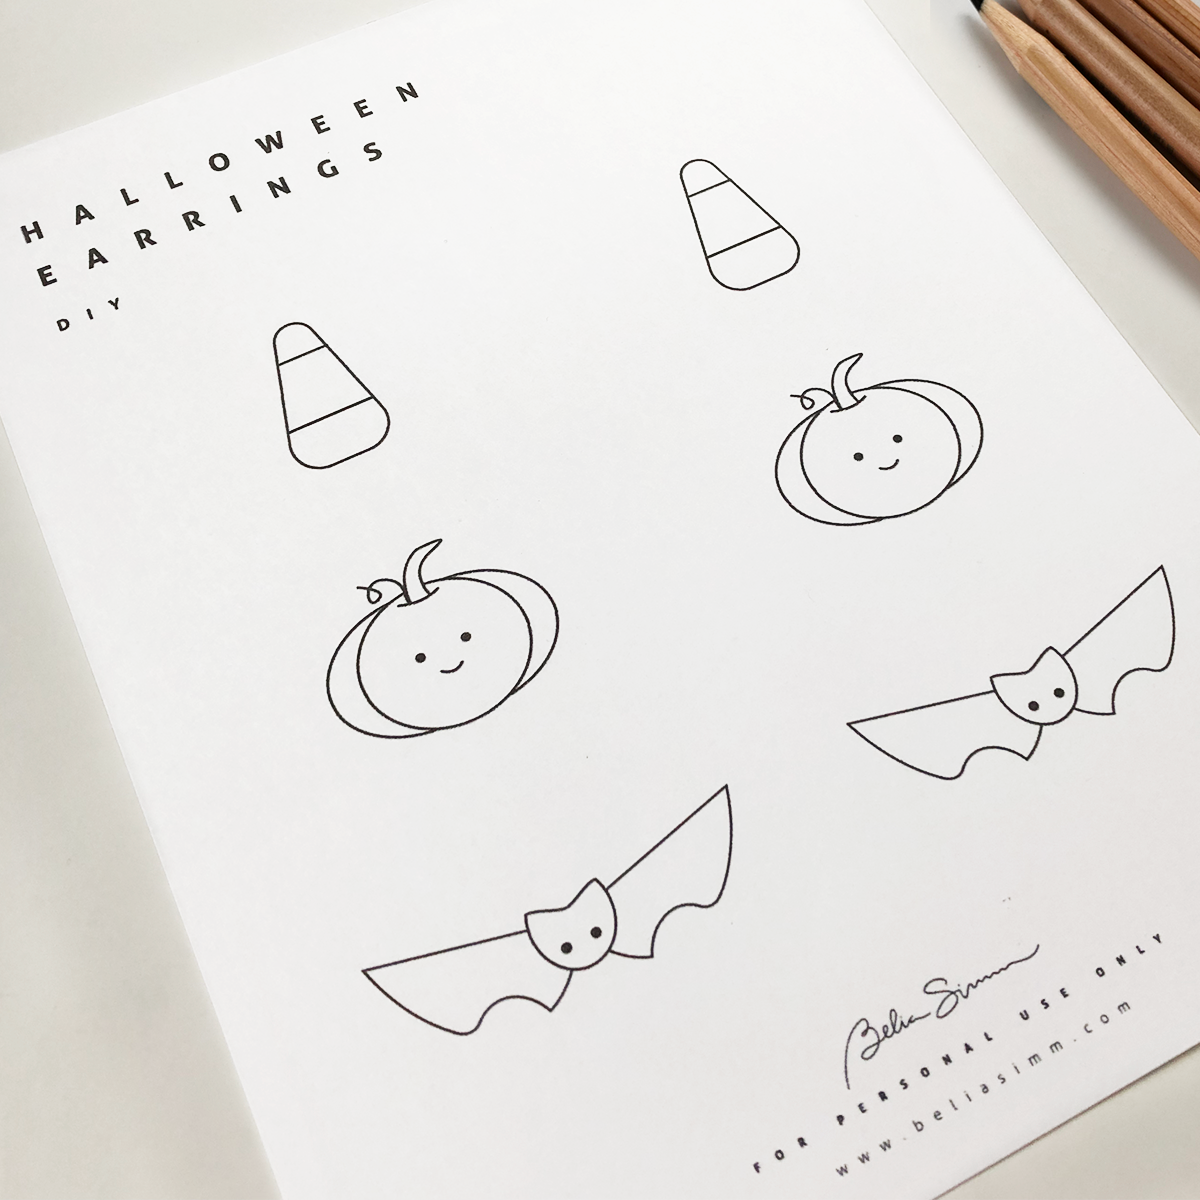
DIY: Halloween Earrings
DIY time! To continue with our Halloween preparations, here is a free printable and a step by step of how to make adorable “candy corn” earrings.
Supplies:
Tombow Recycled Colored Pencils, yellow, orange and black
A white color pencil
Shrinky Dinks Creative Pack, frosted
Ball post earrings and open jump rings
Mod Podge sealer, matte or glossy
Also needed: a white sheet of paper, a pencil, a one-hole paper punch (1/8 inch diameter), washi tape, a pair of scissors, a brush, a baking sheet pan, parchment paper, and jewelry pliers.
Note: use flat earring posts and backs for the pumpkins and bat. They also work for the candy corns. You will also need E6000 Permanent Craft Adhesive, clear to glue the earring posts with the earring designs.
Important: please make sure to read and follow the instructions from the manufacturers for safety purposes and best results.
Step 1: Print
Print the HALLOWEEN EARRINGS FREE PRINTABLE to trace the designs to the shrinking plastic sheet. You can also design your own designs. Make sure to keep them at a similar size to the ones on the sheet, in about a 1.5in diameter area. I included pumpkin and bat designs, as well and kept two of each in case you want to share this activity.
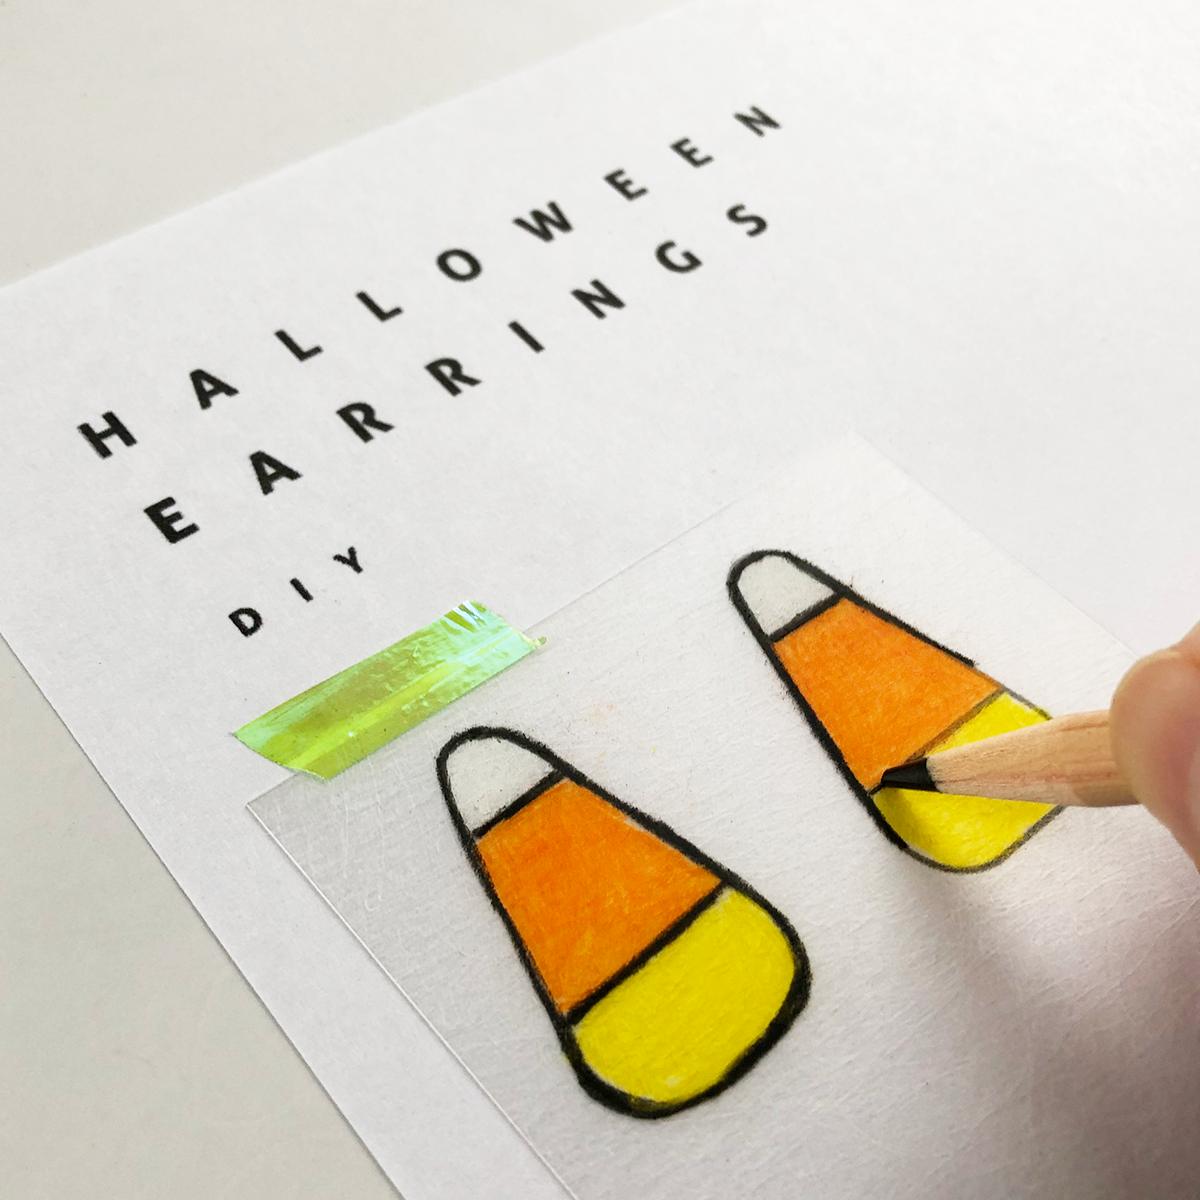
Step 2: Color
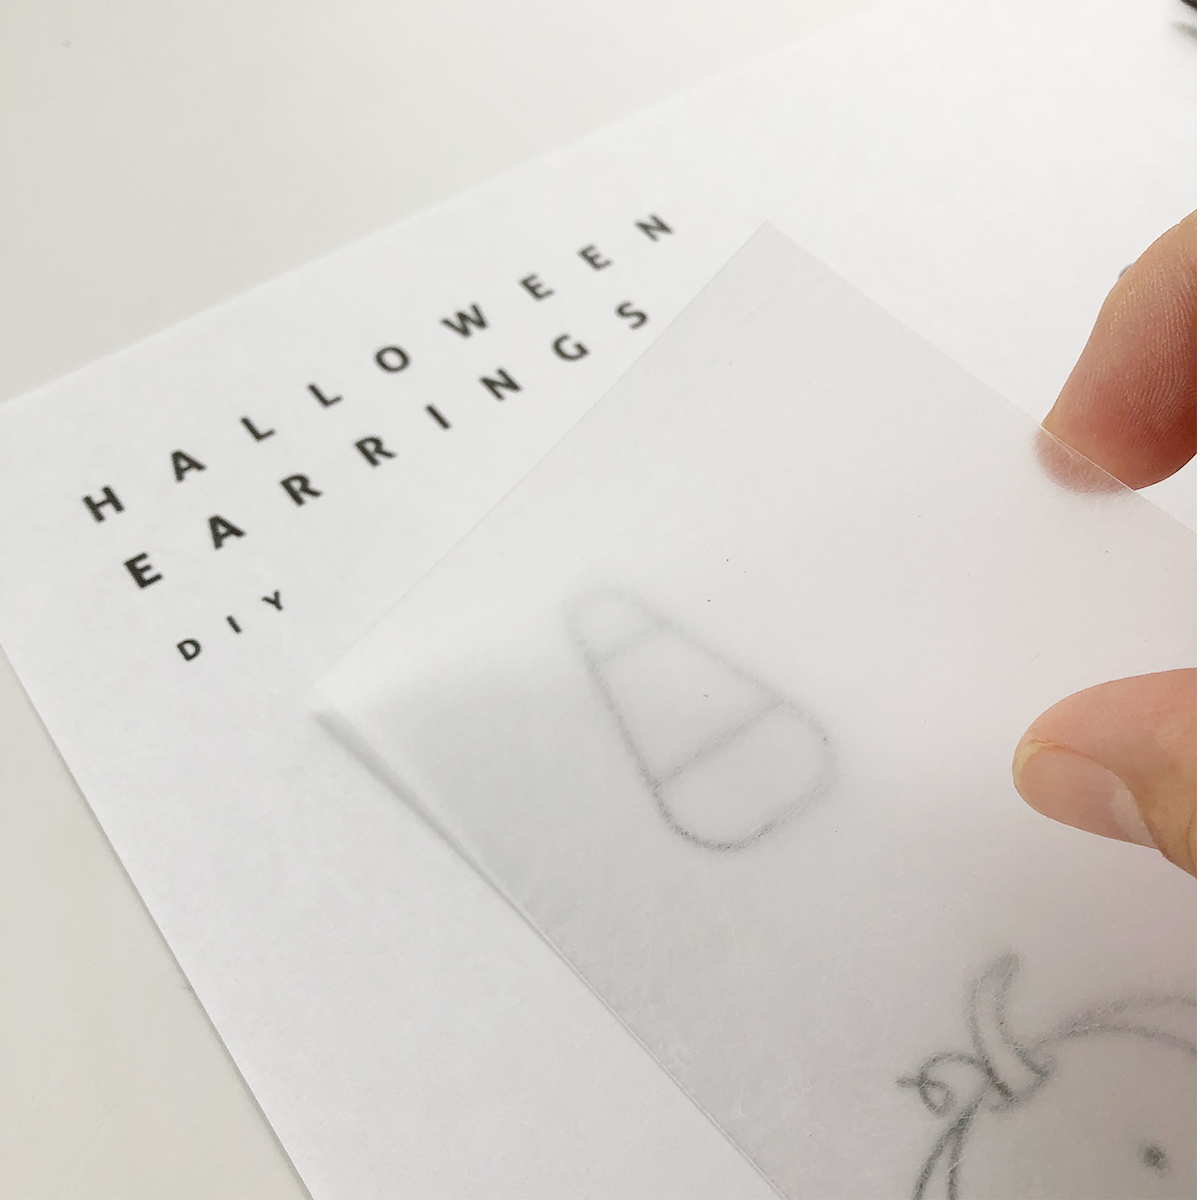
Place a shrinking plastic sheet on top of the candy corn design.
Tip: use a piece of washi tape to secure the shrinking plastic sheet to the print to avoid shifting. Make sure to color on the scratchy/rough side, not the smooth glossy side.
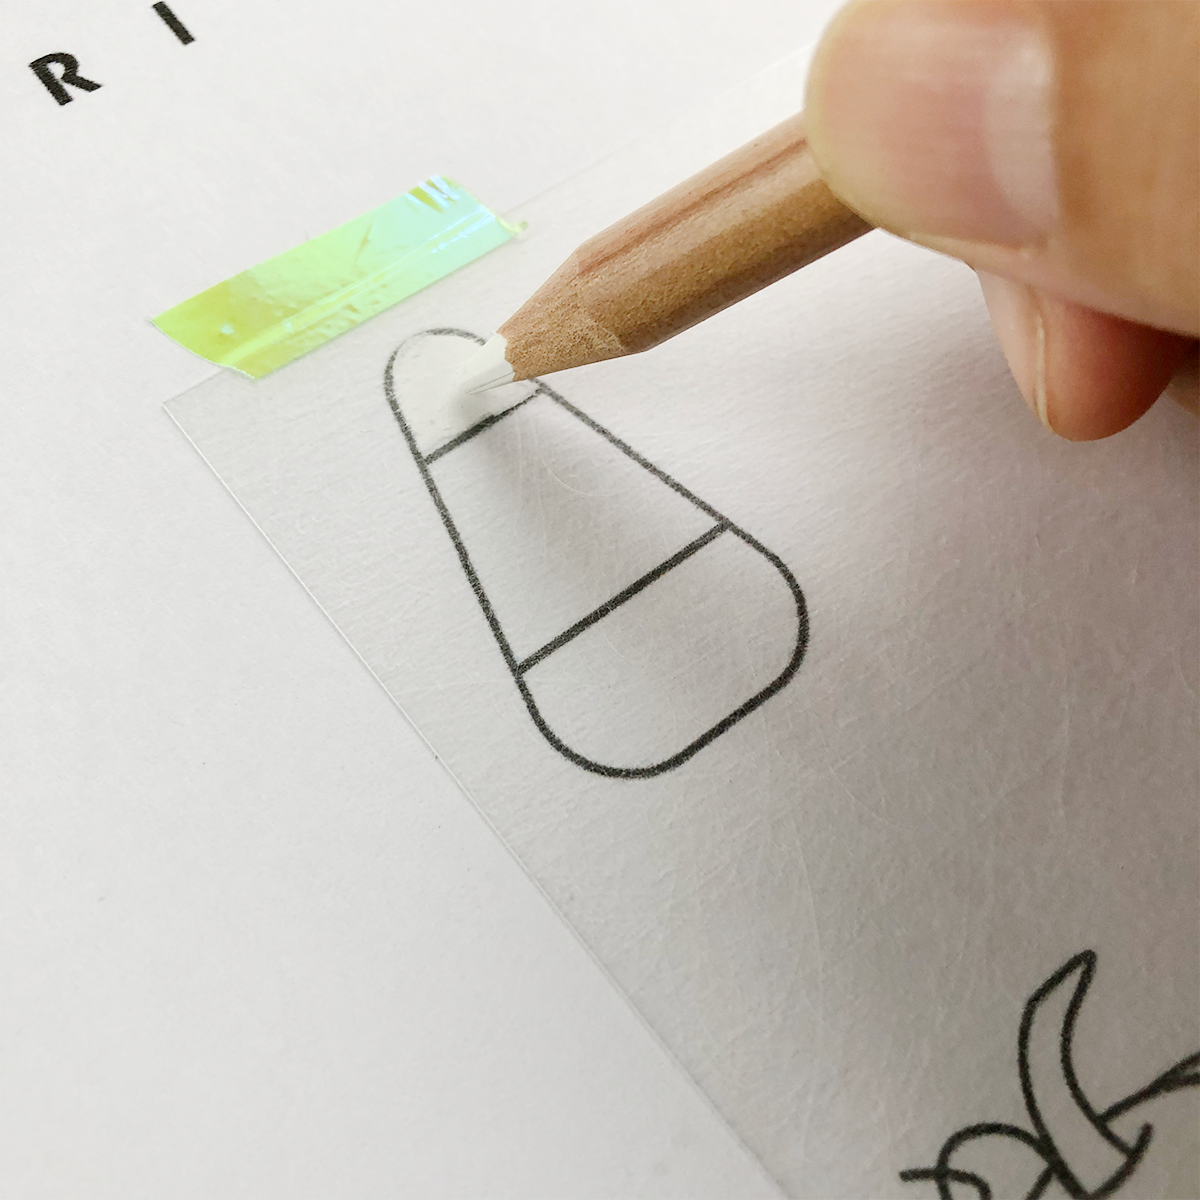
Use the color pencils to paint and outline the candy corn design on the shrinking plastic.
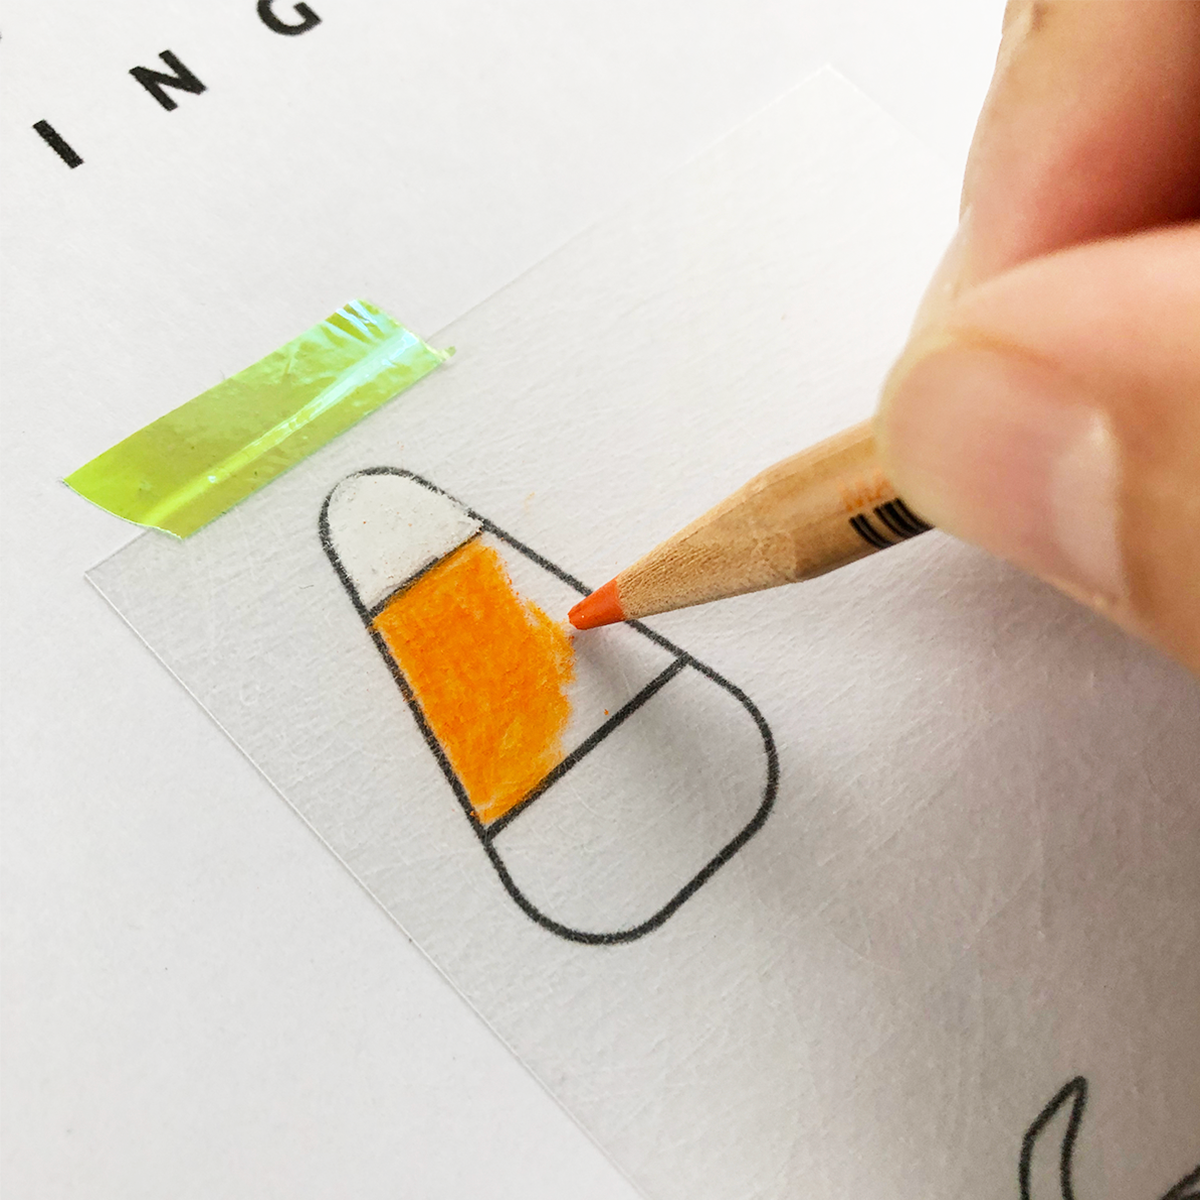
For this project I used the Tombow Recycled Color Pencils, 12 set. They are very vibrant and creamy and applied easily to the shrinking plastic. Since this set doesn’t include white, I found one from another set. You can also use white acrylic paint.

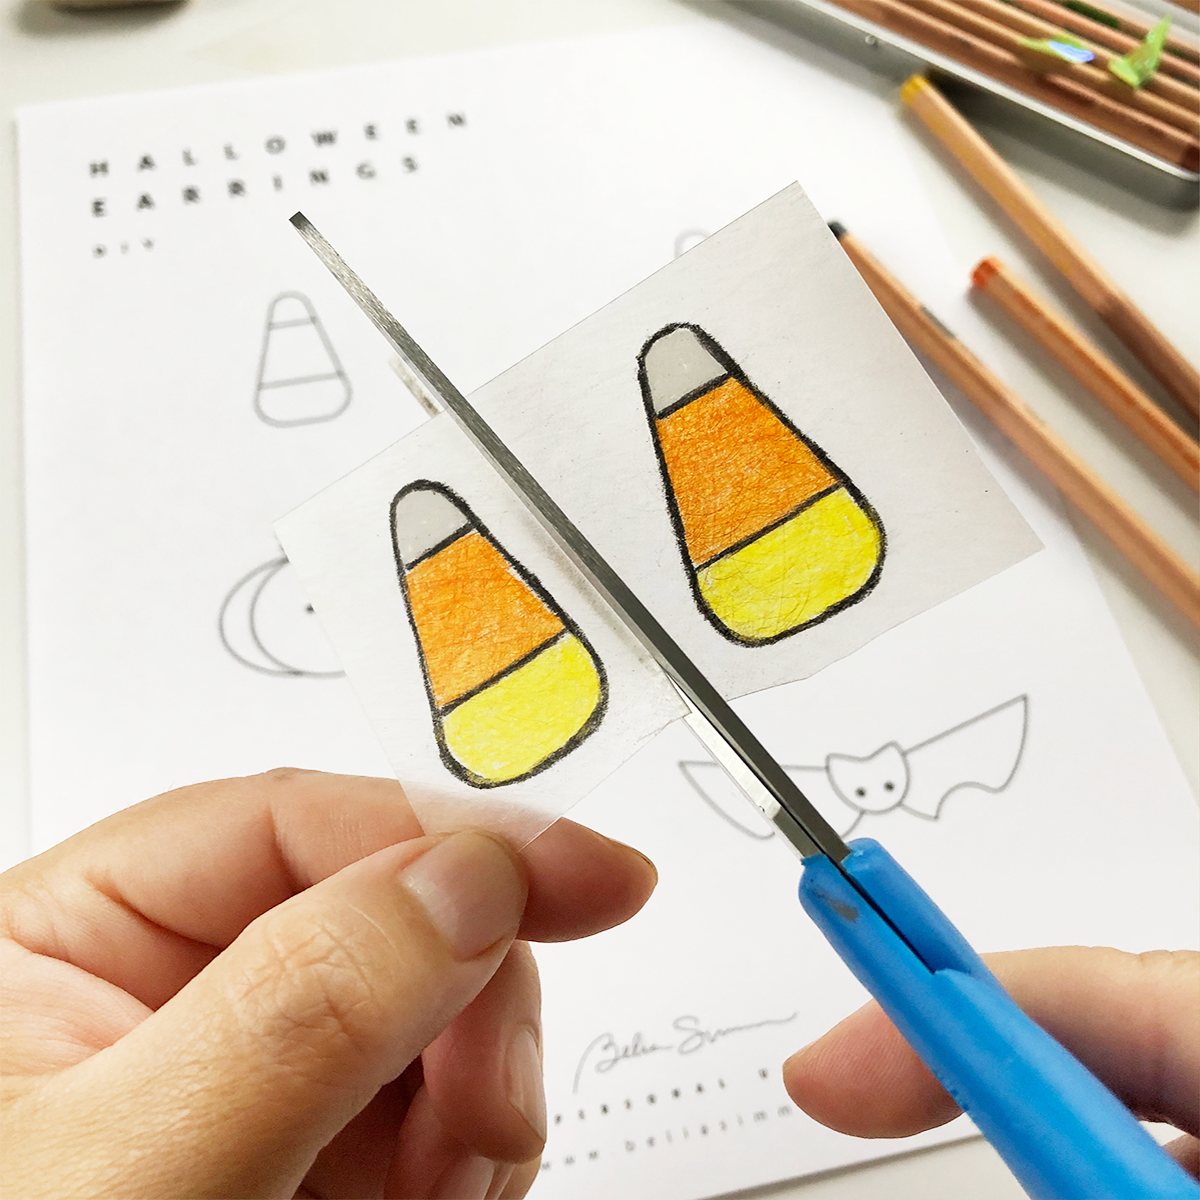
Step 3: Cut
Carefully, cut the candy corn along the edges of the design.
Tip: for an easier cutting, you can also cut the sheet leaving about 1/8 of an inch of space.
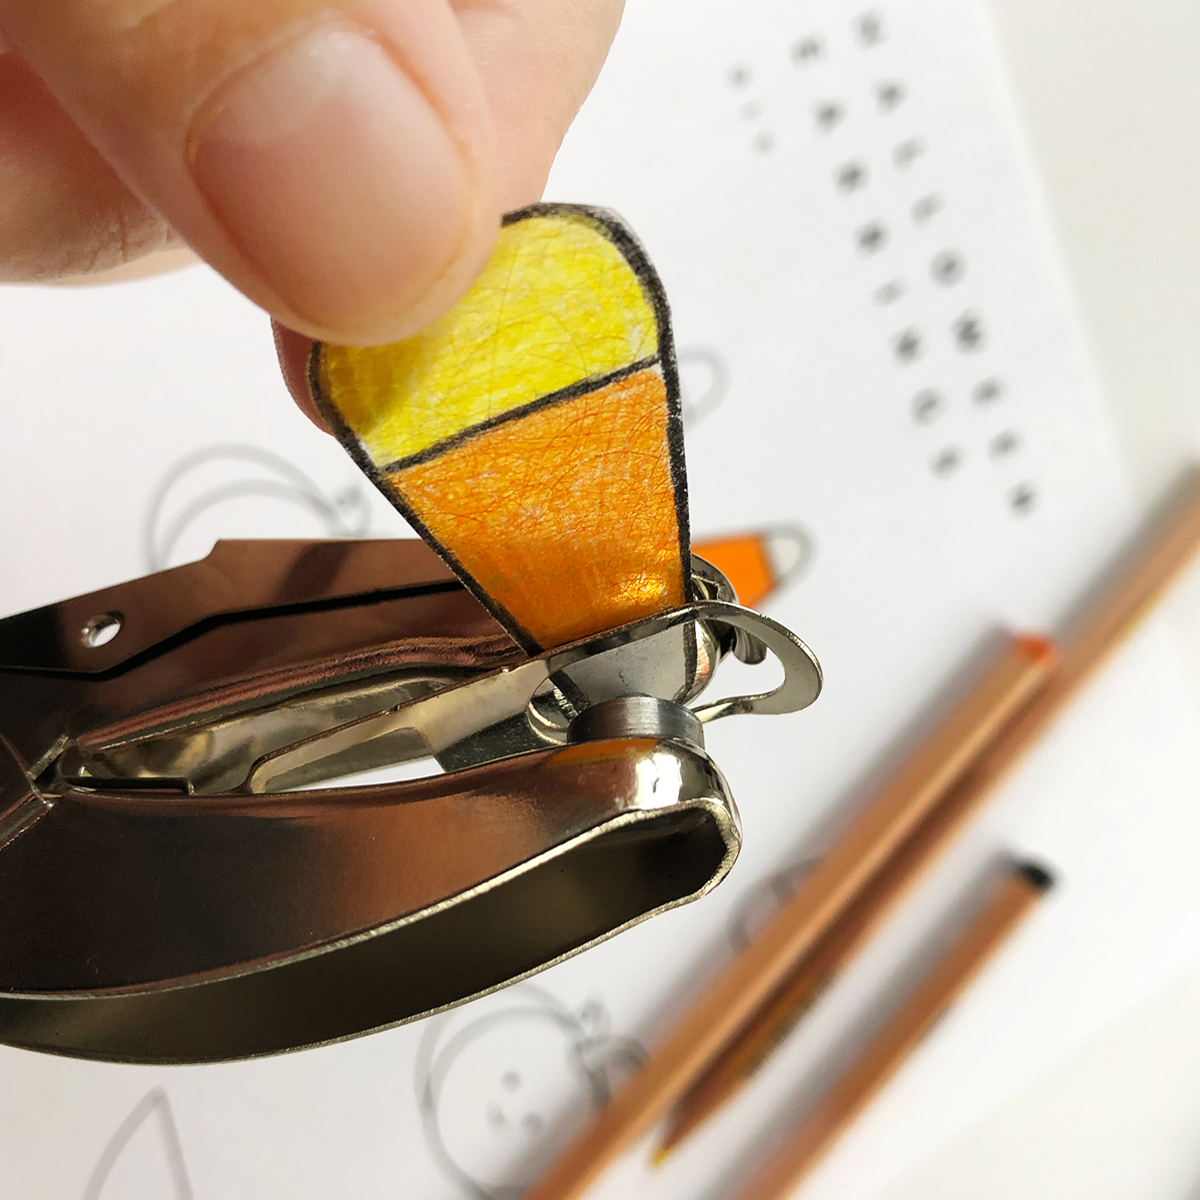
Use a one-hole paper punch (1/8 inch diameter) to make the hole for the jump rings.
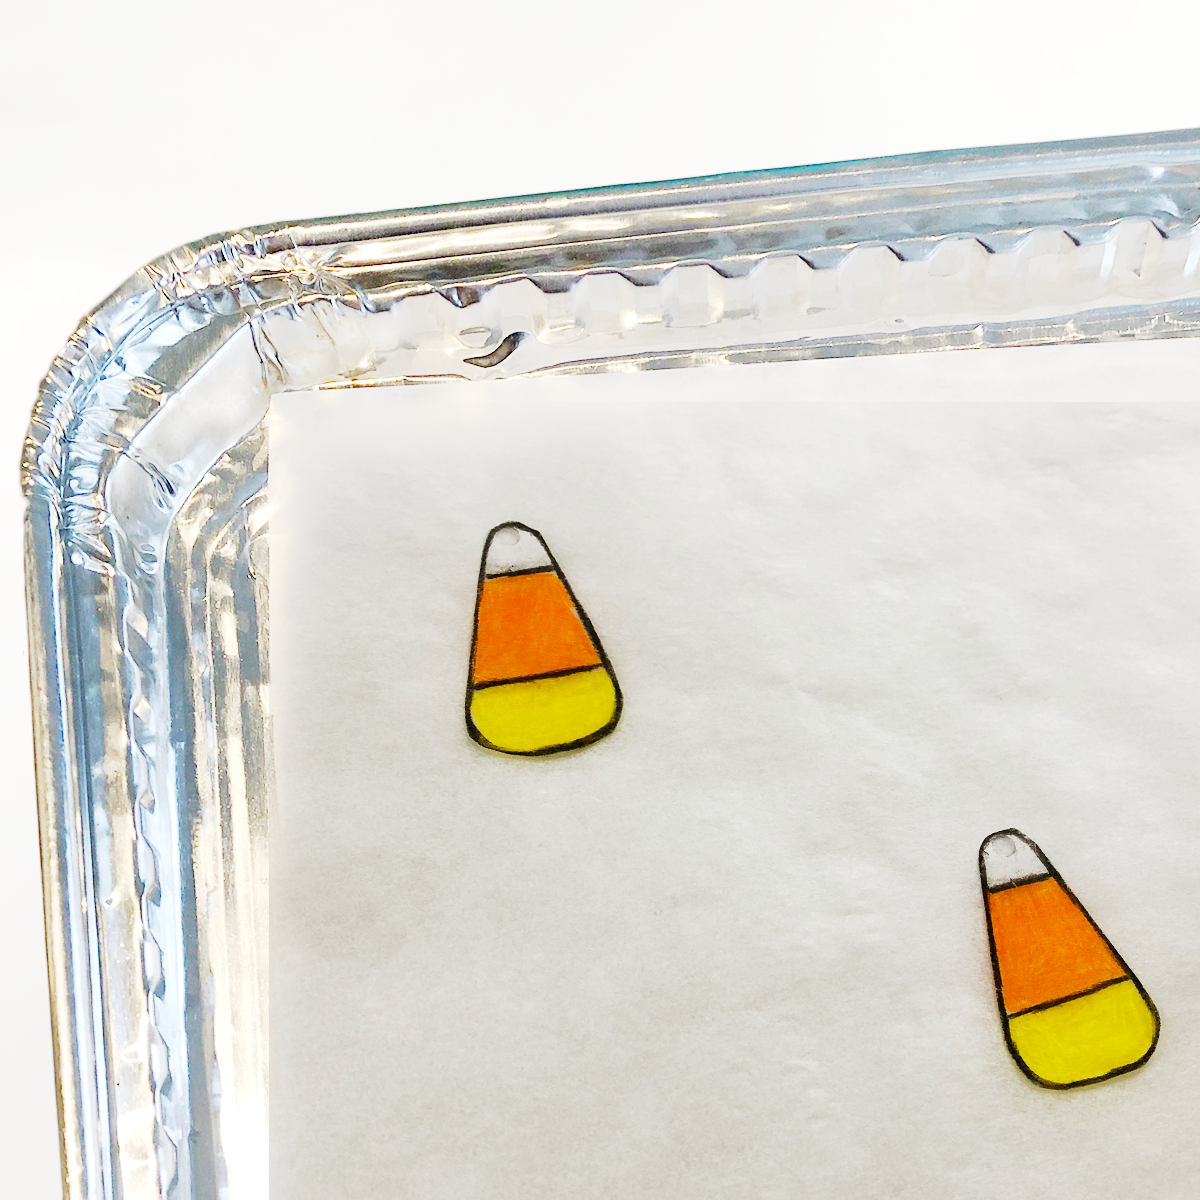
Step 4: Shrink
Place the candy corns on a baking sheet pan, color side up. Make sure to cover the pan with a sheet of baking paper to avoid having the shrinking plastic stick to the baking pan.
Pre-heat your oven (a toaster is recommended, if available) to 325ºF and bake for 1 to 3 minutes until the pieces lie flat.
Tip: bake your pieces individually or make sure there is enough space between them to avoid them getting stuck to each other.
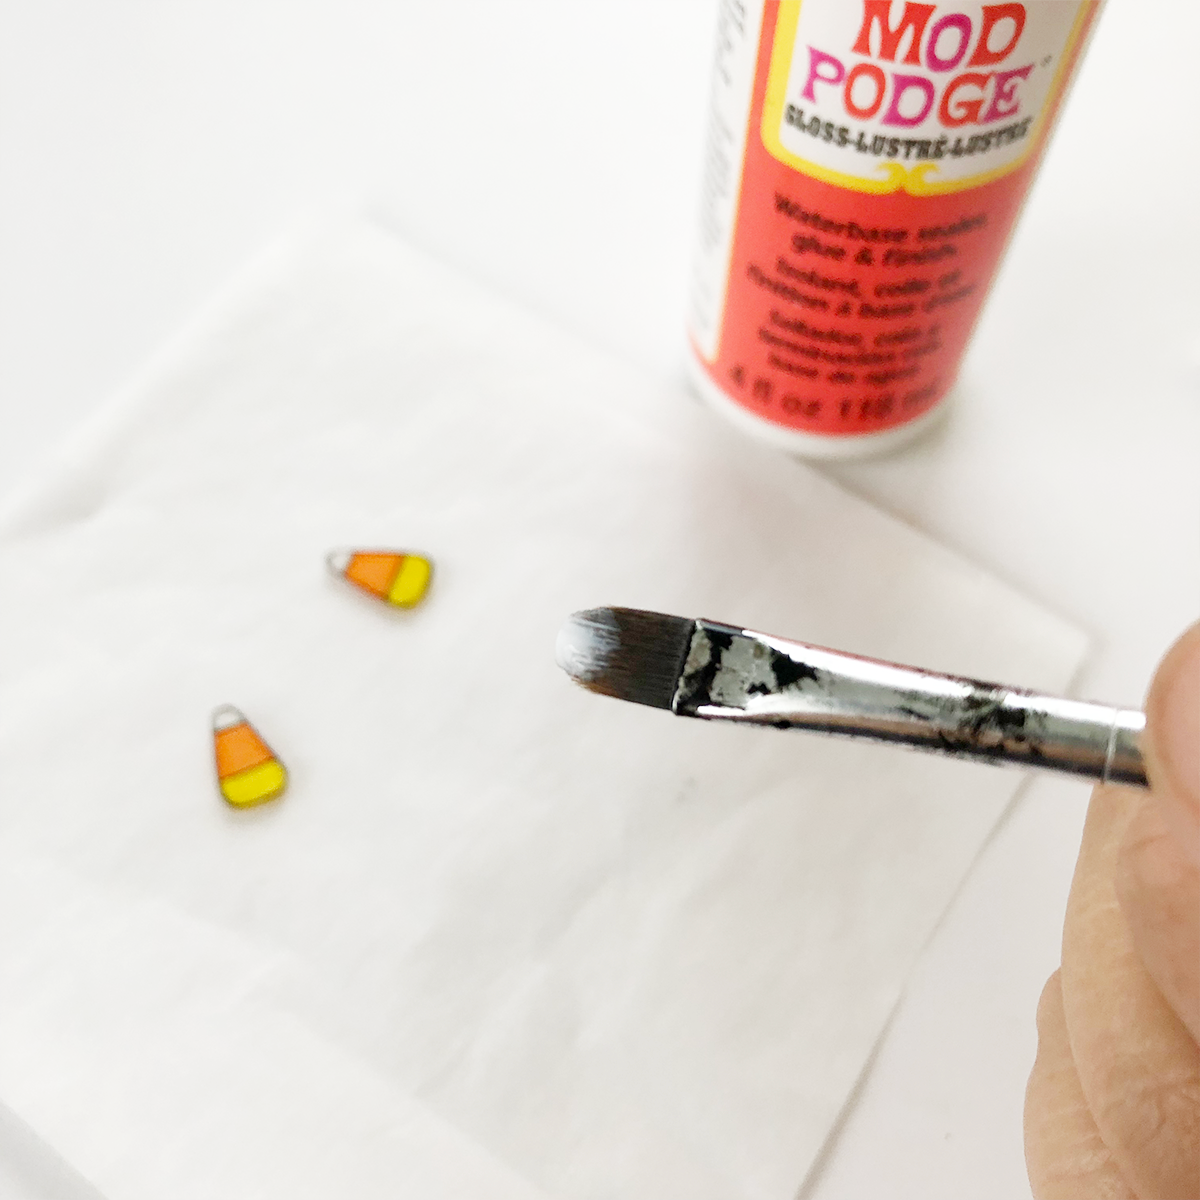
Step 5: Seal
Paint the candy corns with a thin layer of Mod Podge to seal it and avoid getting the pencil color smudge.
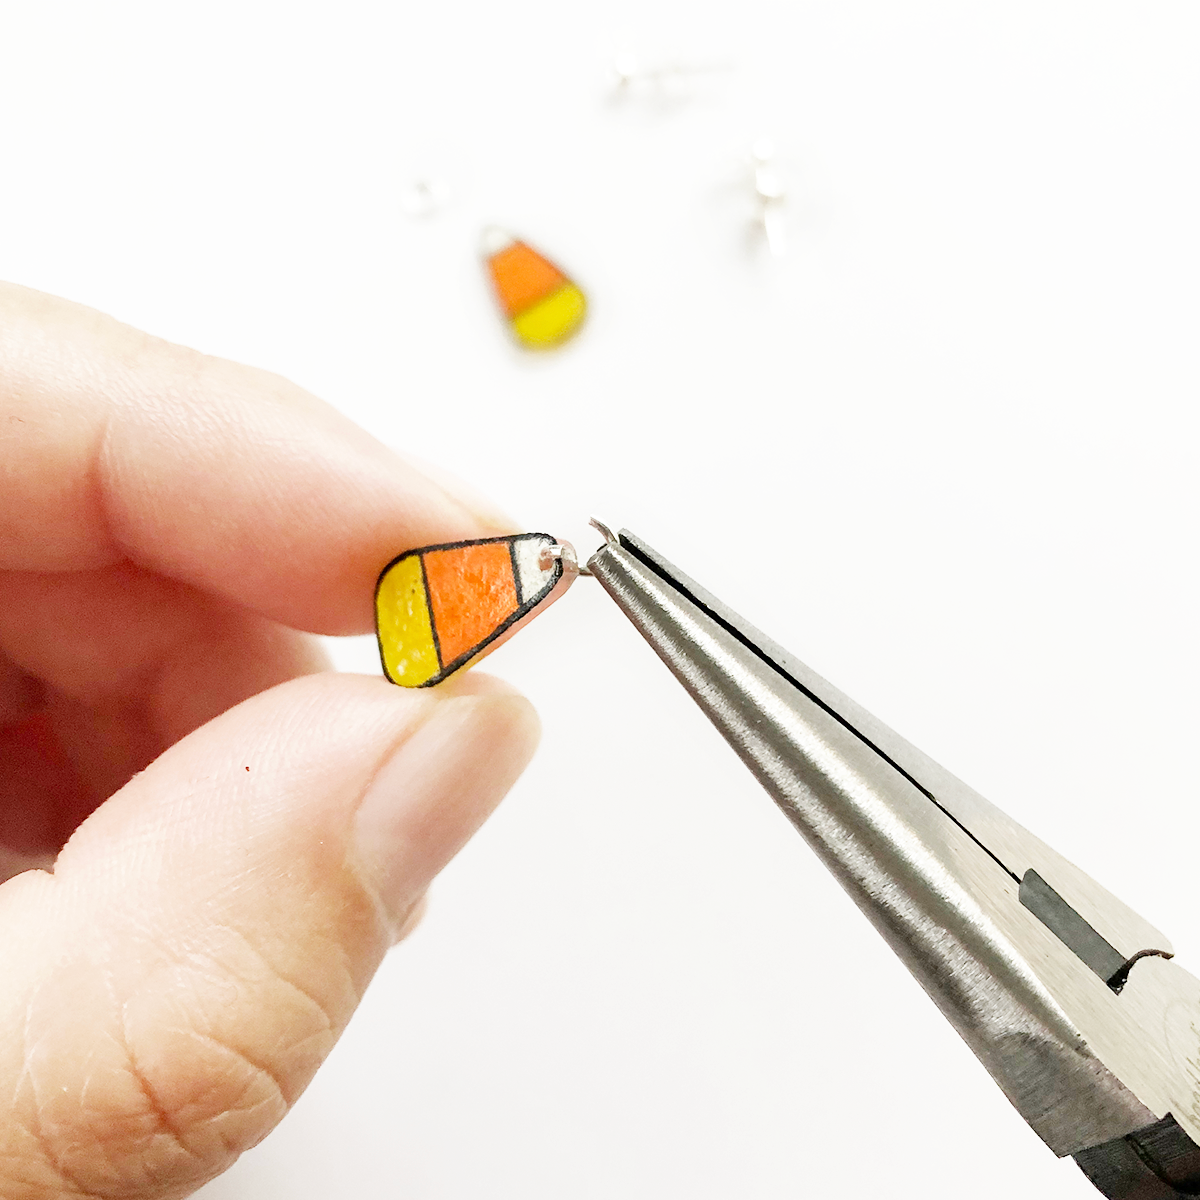
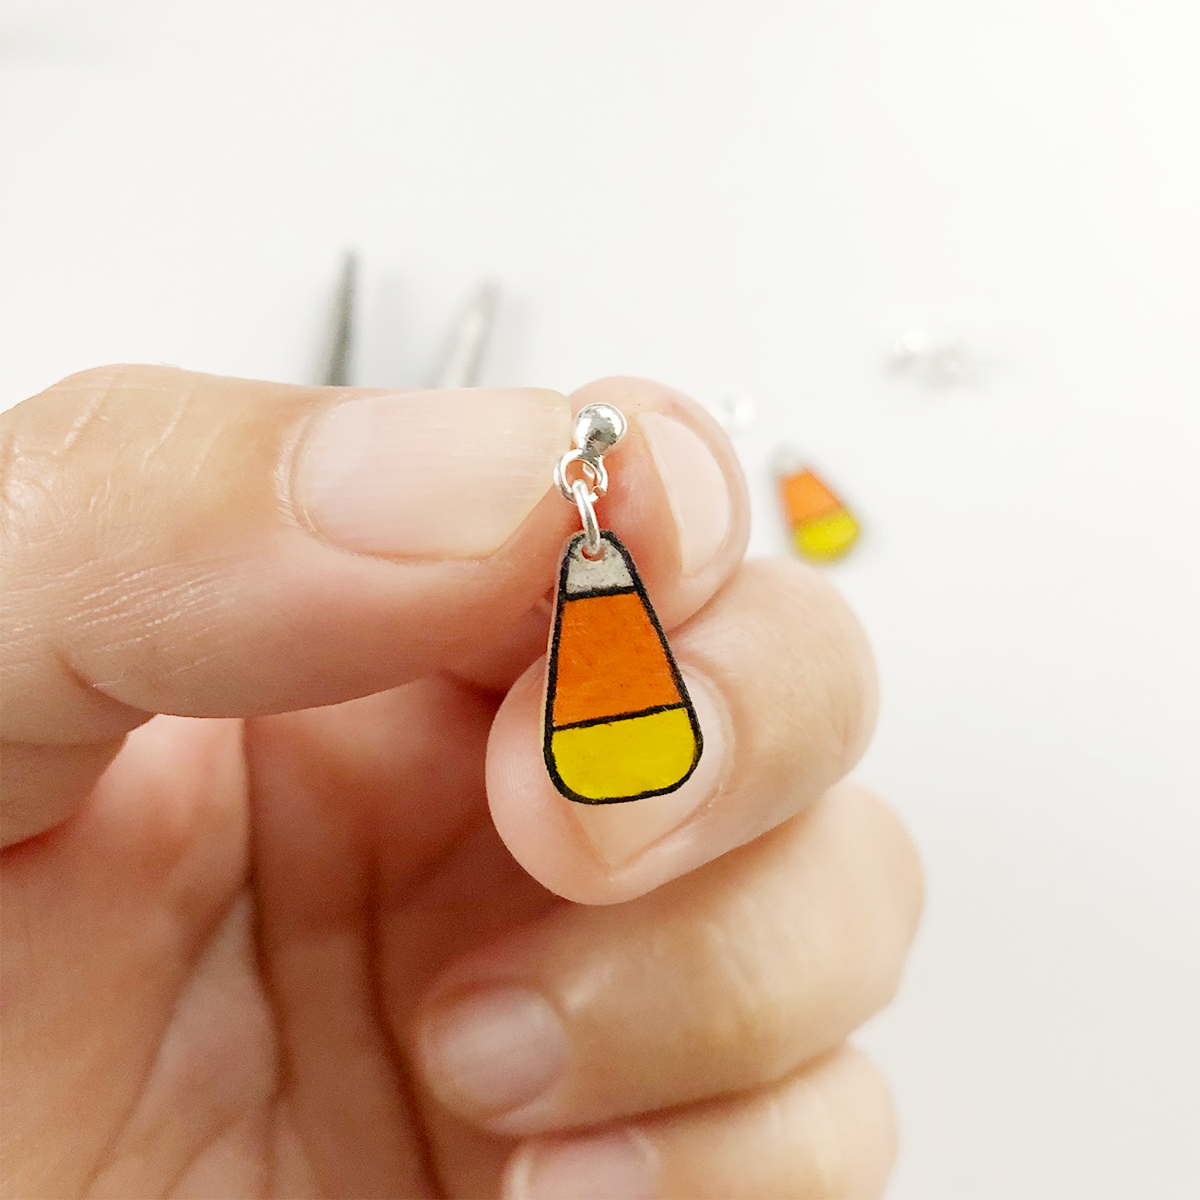
Step 6: Assemble
Hook the shrunk candy corn designs to jump rings with the help of jewelry pliers. Then connect the jump ring to the ball post earring and close securely with the pliers.
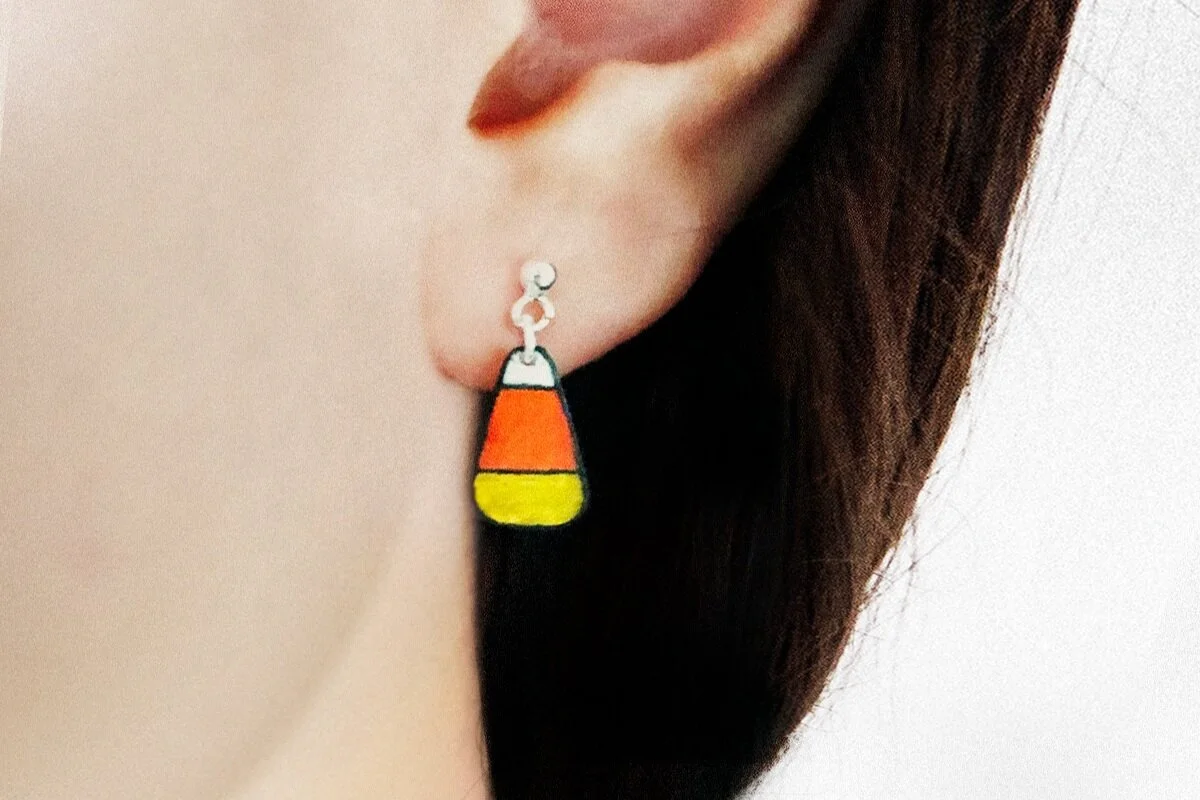
And hocus pocus!
Halloween ready…
Thanks for reading this post. Happy crafting!
xoxo,
B
You can find the art supplies used in this DIY at any art supply store. Here are the ones I found online on Amazon:

Tombow Recycled Colored Pencils, Assorted Colors, 24-Pack


Genuine Sterling Silver Ear Stud Earring Posts and Backs (2 pairs)

Mod Podge Sealer and Finish, 2 Ounce Bottle, Set of 5

Disco Washi Tape for Packing or Crafting, Set of 1

Sterling Silver Jump Lock Rings, 4mm (20-Pieces)
